
How to upgrade or downgrade your active hosting/VPS packages
As your website grows, you may need more disk space, bandwidth, or CPU power. Ceylon Servers makes it easy to change your plan at any time without losing your data.
Step 1: Log in and Access Your Product
- Log in to the Ceylon Servers Client Dashboard.
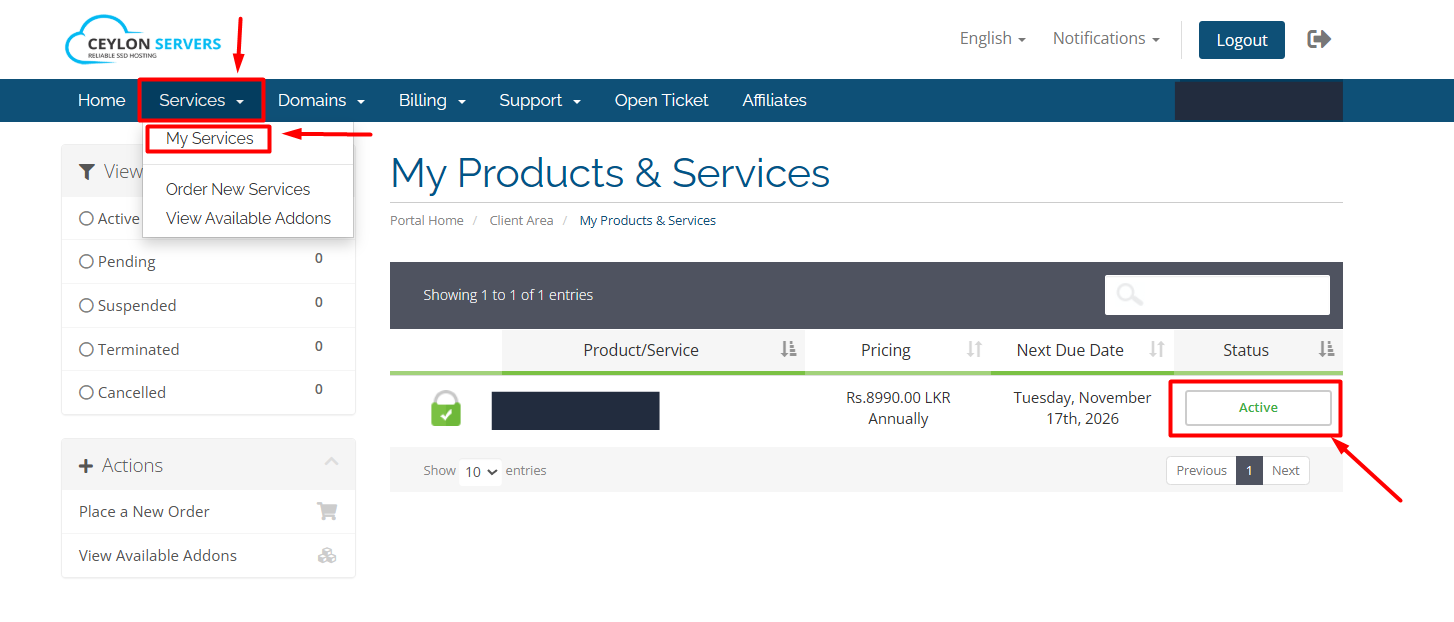
- Navigate to "Services" and then select "My Services".
- Click on the active service (Hosting or VPS) that you wish to modify to open the Product Details page.
Step 2: Locate the Upgrade/Downgrade Option
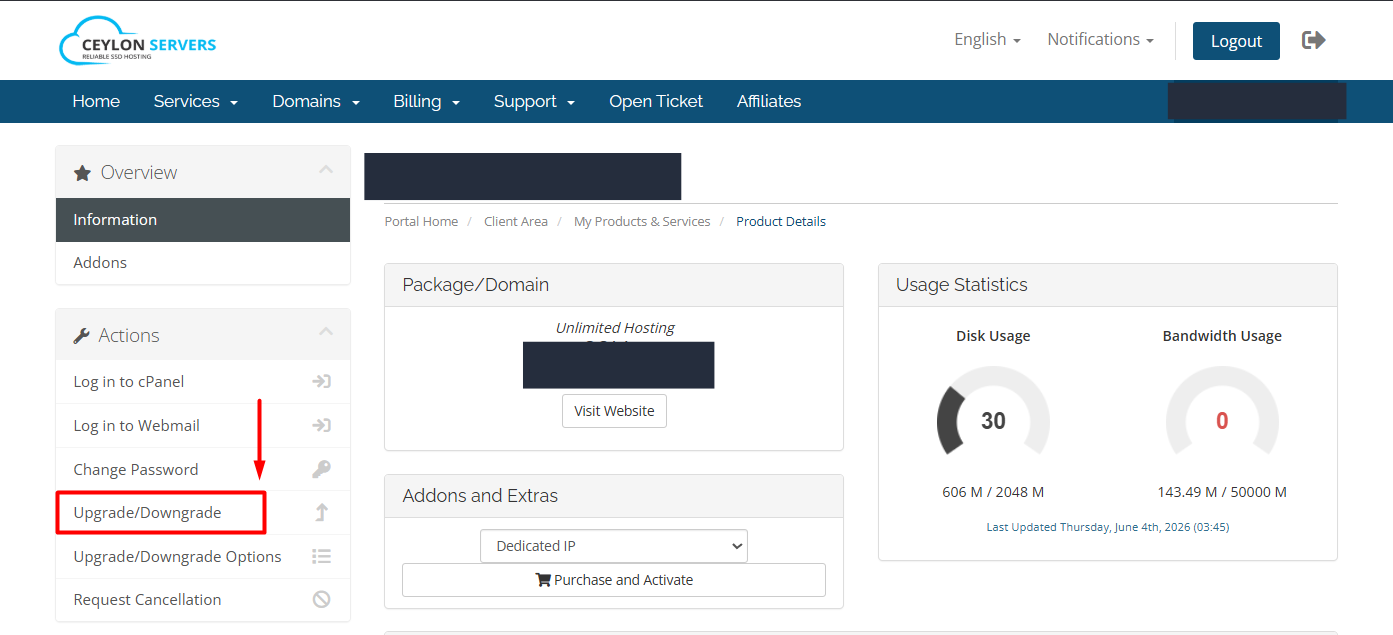
- Find and click the "Upgrade/Downgrade" link located in the sidebar.
- Alternatively, if you only wish to change specific configurable features (like adding a Dedicated IP), select "Upgrade/Downgrade Options".
Step 3: Choose Your New Plan
- A list of available packages will be displayed.
- Compare the resources and prices of the new plans.
- Click the "Choose Product" button next to the plan you want to switch to.
Step 4: Payment and Completion
- For Upgrades: The system will calculate the difference about Packages. You only pay for the remaining time in your current billing cycle at the new rate.
- For Downgrades: Any difference in price may be added as a credit to your account, depending on our billing policy.
Once the payment is processed, your resources (Disk Usage, Bandwidth, etc.) will be automatically updated as shown in the Usage Statistics section.
Important Things to Remember
- No Downtime: In most cases, upgrading or downgrading hosting packages does not cause any downtime for your website.
- VPS Changes: For VPS plans, a server reboot might be required to apply new hardware limits (CPU/RAM).
- Backups: While the process is automated, it is always a best practice to generate a fresh backup via cPanel File Manager or the Backup shortcut shown in "Quick Shortcuts" before making structural changes.
Need a Custom Plan? If the available options do not meet your specific requirements, please Open a Ticket from the top menu to speak with our technical team