
How to install a Free Let's Encrypt SSL certificate on your site
If you want to secure your website quickly without logging into your primary billing portal, you can generate and install a 100% Free Let's Encrypt SSL Certificate directly inside your cPanel interface.
The built-in Let's Encrypt manager verifies your domain name layout automatically and deploys a secure padlock icon (https://) in less than a minute.
Follow this clear, step-by-step guide to issue your certificate:
Step 1: Locate the Let's Encrypt Tool in cPanel
- Log in to your CeylonServers cPanel account.
- Scroll down to the Security section cluster, or use the top search bar and type "SSL/TLS Certification".
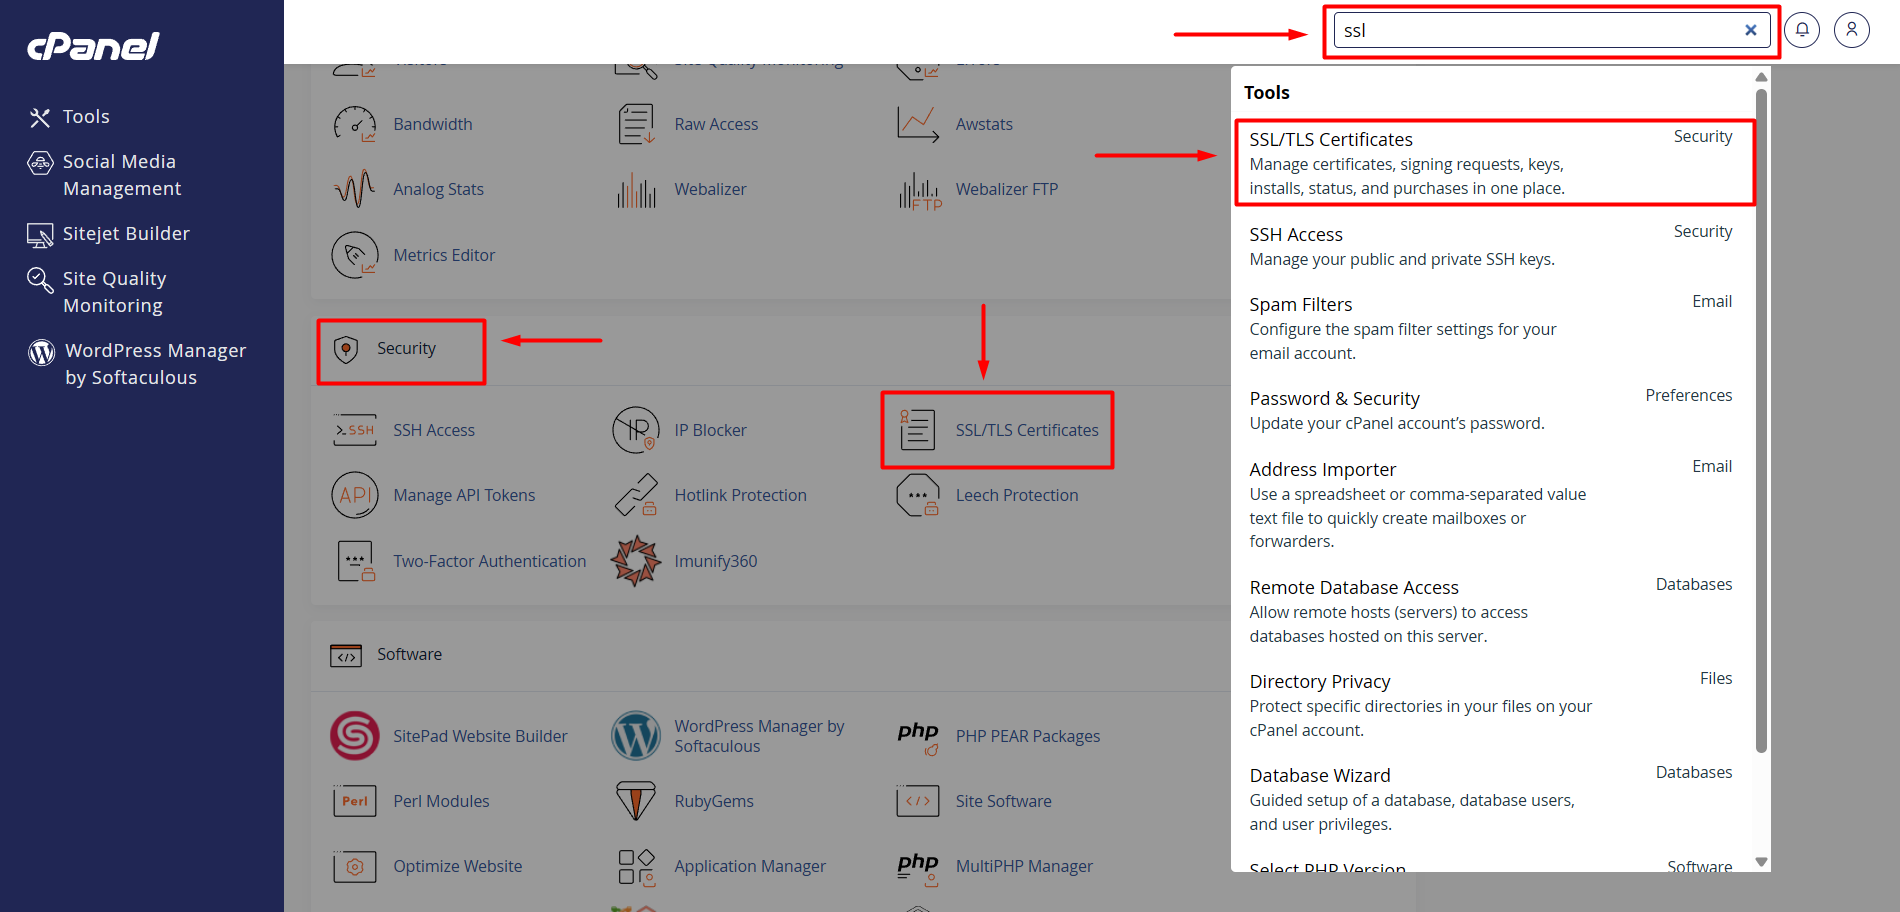
- Click on the "SSL/TLS Certification" icon.
Step 2: Find Your Domain under "Issue a New Certificate"
- When the interface loads, you will see two main tables on the screen. Scroll down to the second table titled "Issue a new certificate".
- Look at the list to find the specific domain or subdomain you want to secure.
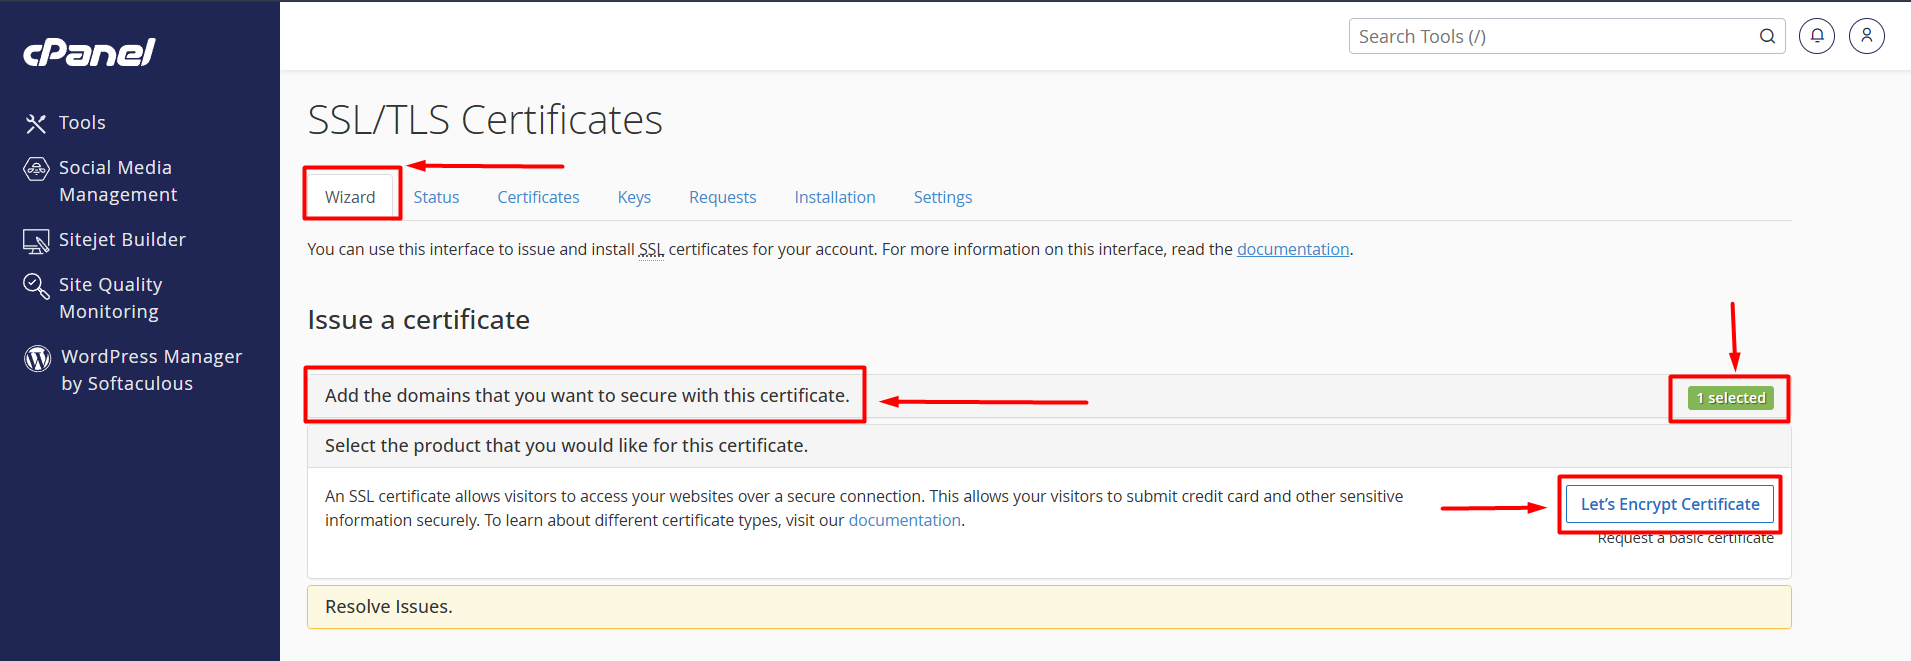
- On the far right side of your domain row, click the "Actions" link that says "Issue Encrypt Certificate".
Step 3: Select Your SSL Include Settings
A fresh configuration parameters sheet will open. Here, you must choose which aliases should be covered by this secure security token:
Select Include Options: Under the Add cPanel subdomains section, ensure your main variations are checked:
yourdomain.comwww.yourdomain.commail.yourdomain.com(Crucial if you want to secure your incoming/outgoing corporate emails!)
Choose the Validation Method: Leave the default choice selected as "http-01" (This is the fastest, automated server handshake method).
Step 4: Click Issue and Finalize Deployment
- Scroll to the bottom of the options layer and click the blue "Issue" button.
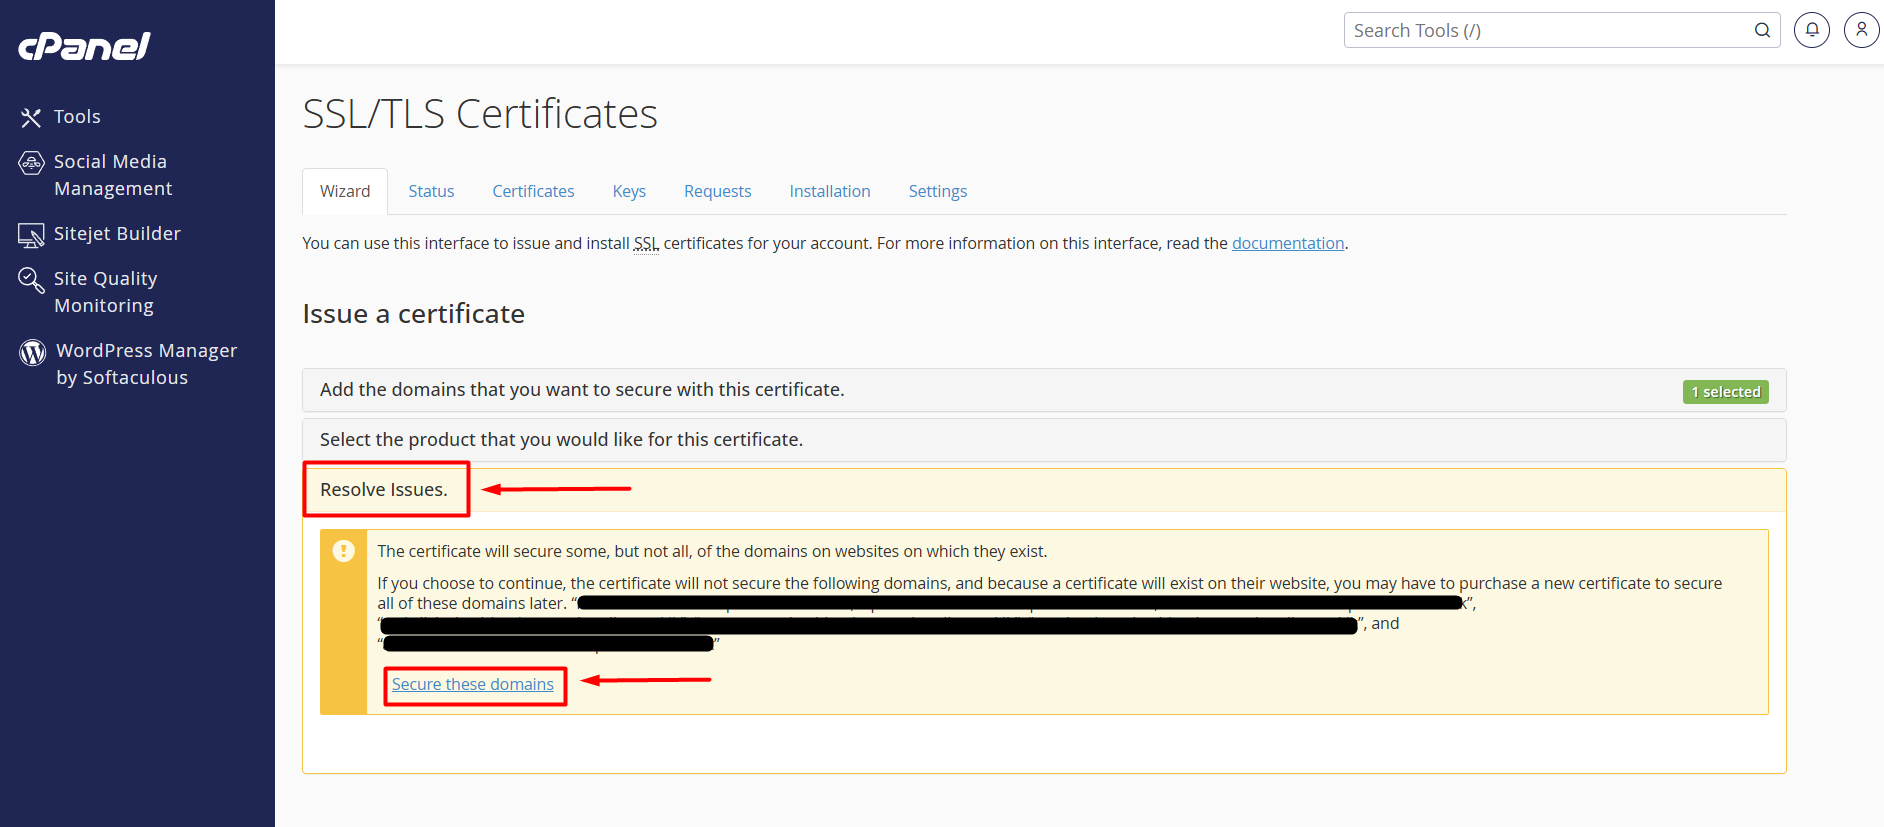
- Do not reload or close your browser tab window. The server script engine is now communicating directly with the Let's Encrypt global security matrix to register your encryption keys.
- Within 30 to 60 seconds, a green success banner message will pop up stating:
- "The SSL certificate is now installed onto the domain... The network server will restart in the background."
Step 5: Verify Your Secure Connection
Open a new private/incognito browser tab.
Type your website address using the secure layout: https://yourdomain.com
Click the Padlock Icon next to your URL in the address bar. It should show that the certificate is completely valid, issued by Let's Encrypt, and fully encrypted!
- Troubleshooting: Getting an "ACME / Validation Failed" Error Log? If the issuance process drops an error screen, it means the Let's Encrypt verification bot could not trace your domain back to our server node.
- Check Name Resolution: Ensure your domain's Nameservers (NS) are fully pointing to CeylonServers and have completely propagated globally (which can take 2 to 24 hours for brand new domains).
- Disable Cloudflare Temporarily: If you are using Cloudflare proxy routing (the orange cloud icon), change it to "DNS Only" (grey cloud) inside your Cloudflare panel before clicking issue, as their proxy wall can sometimes block the Let's Encrypt verification path.
If your DNS paths are completely correct but the cPanel issuance loop still displays an error, please Open a Technical Support Ticket inside your client area, and our systems engineering team will manually inject the server security credentials for you!