Creating and managing custom email accounts and forwarders
Using a professional email address that matches your domain name (such as [email protected]) builds immediate trust with your clients and establishes a credible brand identity.
At CeylonServers, your hosting package allows you to create multiple custom mailboxes and set up automated Email Forwarders (which automatically route incoming corporate mail straight to your personal inbox, like Gmail).
Follow this simple, step-by-step guide to configure both options inside your cPanel dashboard:
Part 1: How to Create a Custom Email Account
- Log in to your CeylonServers cPanel dashboard.
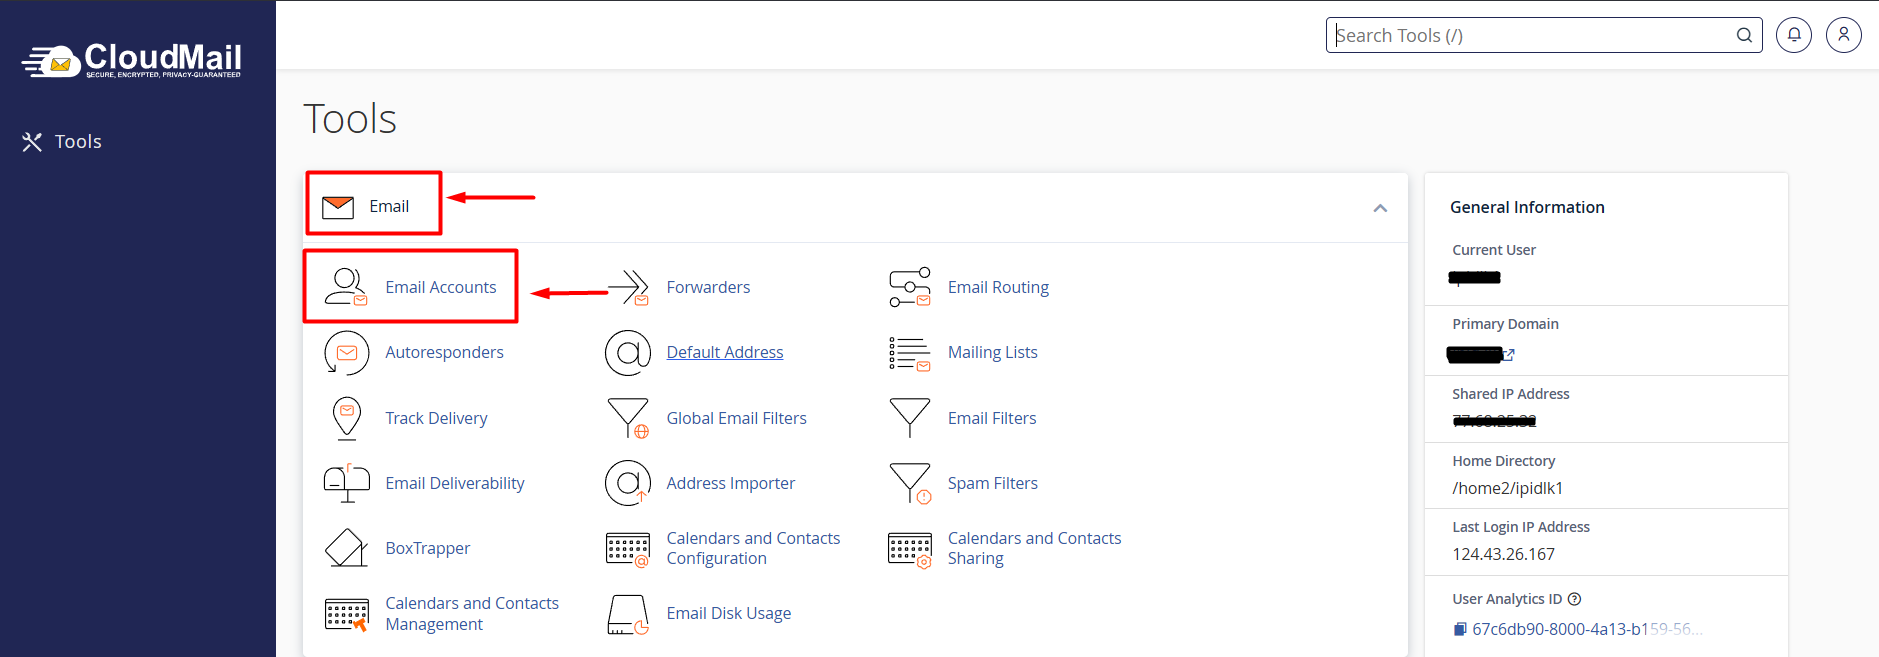
- Navigate down to the Email section and click on the "Email Accounts" icon.
- Click the blue "+ Create" button located on the right-hand side of the interface.
- Configure your new mailbox properties:
- Domain: Select your preferred domain name from the dropdown menu if you host multiple domains.
- Username: Type the prefix of your email address (e.g., typing
infowill generate[email protected]). - Password: Enter a highly secure password or click the "Generate" button to create a strong one automatically. (Save this password securely as you will need it to link your devices!)
- Storage Space: Click Optional Settings to allocate a specific storage quota limit (e.g., 1024 MB) or check "Unlimited" depending on your hosting plan boundaries.
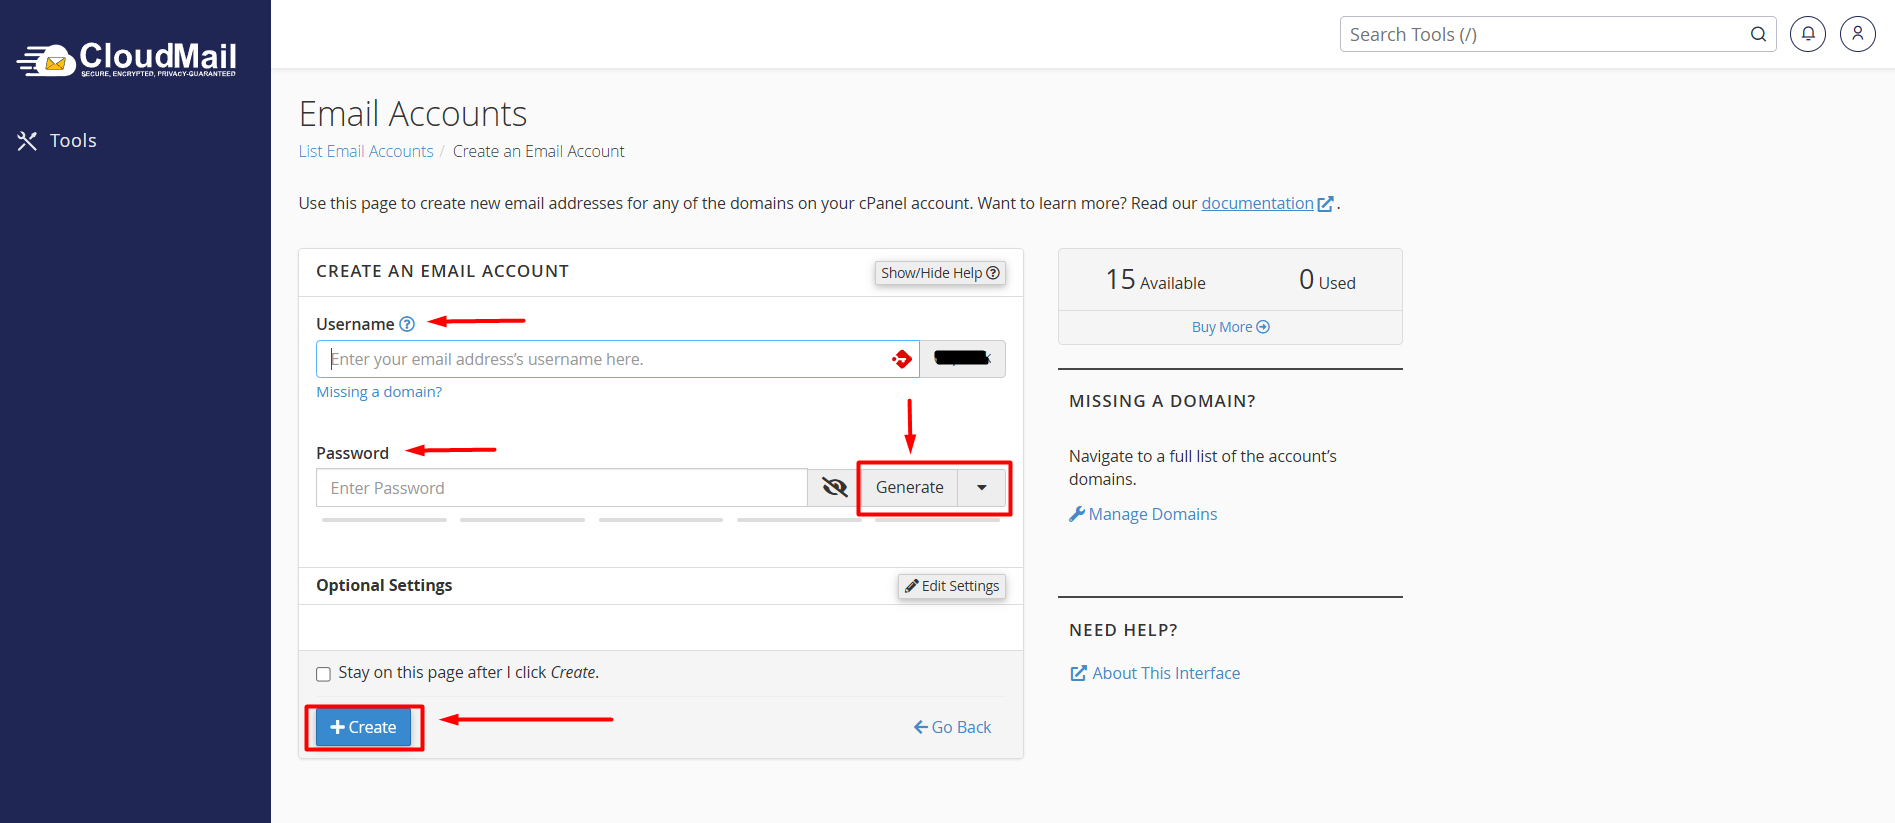
Click the blue "+ Create" button at the bottom.
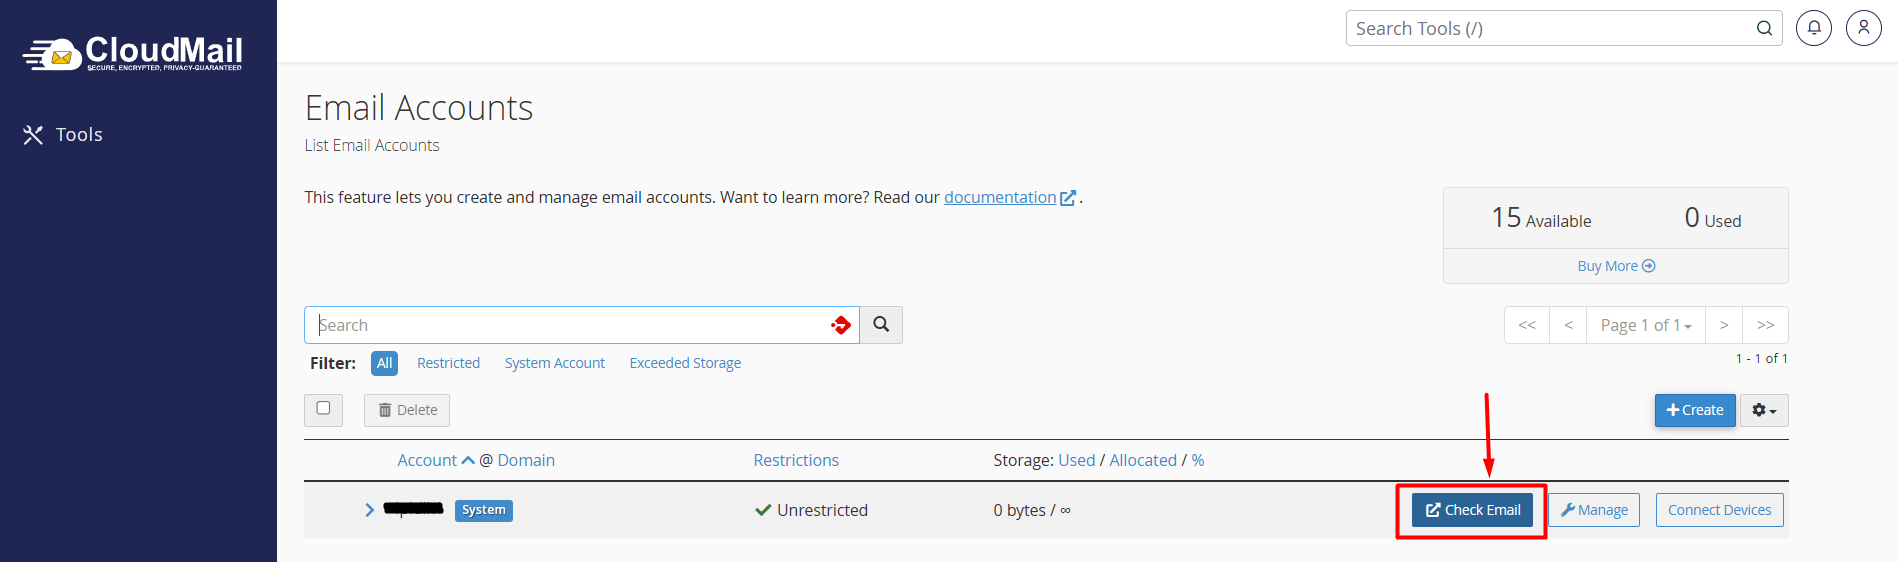
Your custom corporate email is now active! You can access it immediately by clicking the "Check Email" button next to it to open the Webmail interface (Roundcube).
Part 2: How to Set Up an Email Forwarder
An email forwarder is perfect if you want to receive copies of your business emails inside your personal email app instantly, without needing to check multiple mailboxes manually.
- Go back to your main cPanel home dashboard layout.
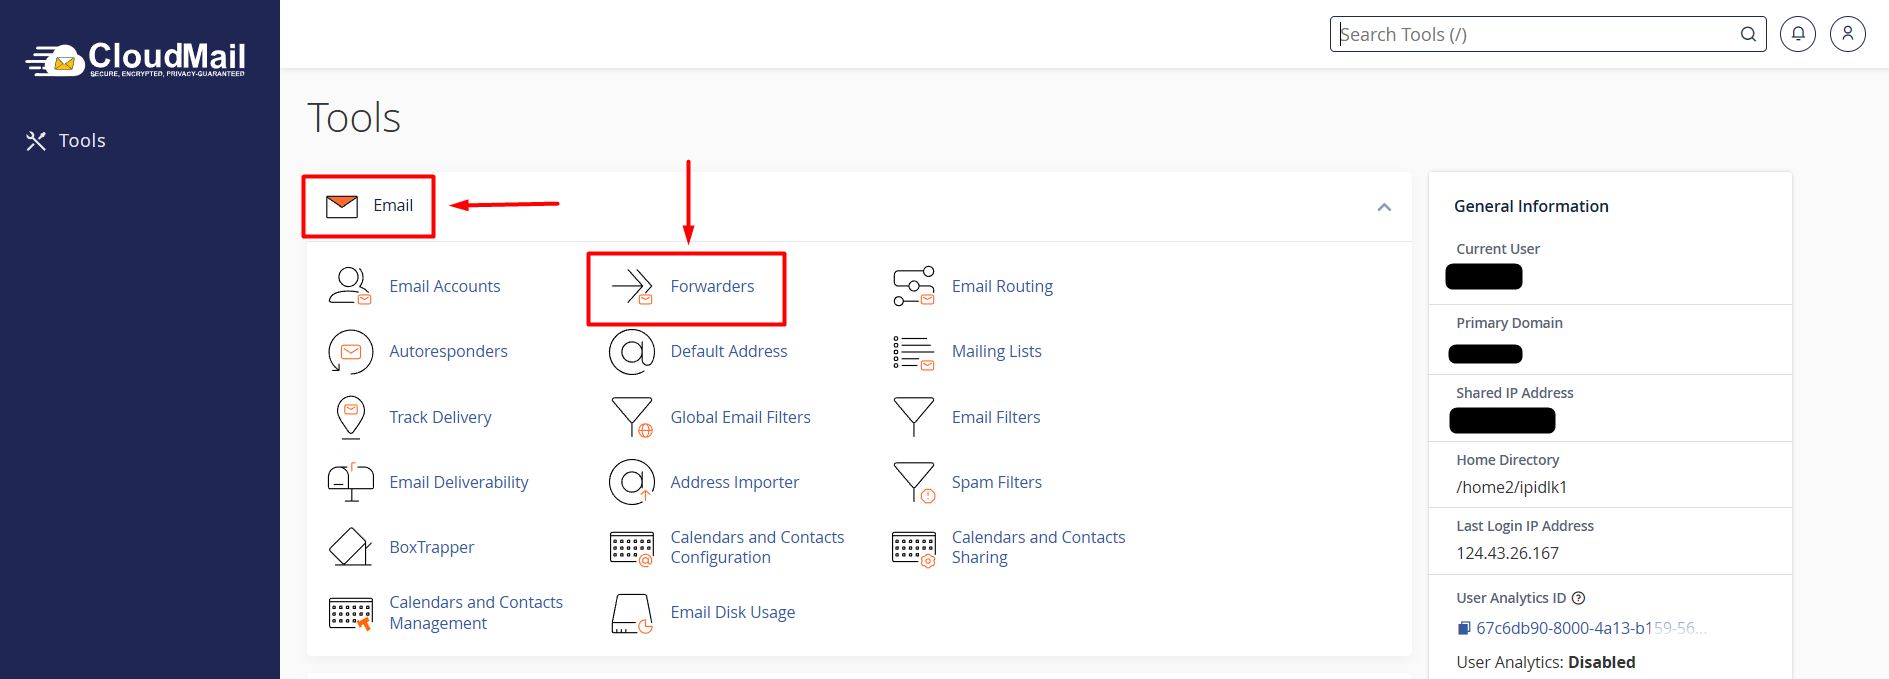
- Under the Email section cluster, click on the "Forwarders" icon.
- Click the blue "Add Forwarder" button.
- Fill in the email routing parameters carefully:
- Address to Forward: Type only the username prefix of the email you want to redirect (e.g., if you want to forward
[email protected], just typesalesin this box). - Domain: Select the matching domain from the adjacent dropdown menu.
- Destination (Forward to email address): Check the radio button next to "Forward to Email Address" and type your full personal destination inbox address (e.g.,
[email protected]).
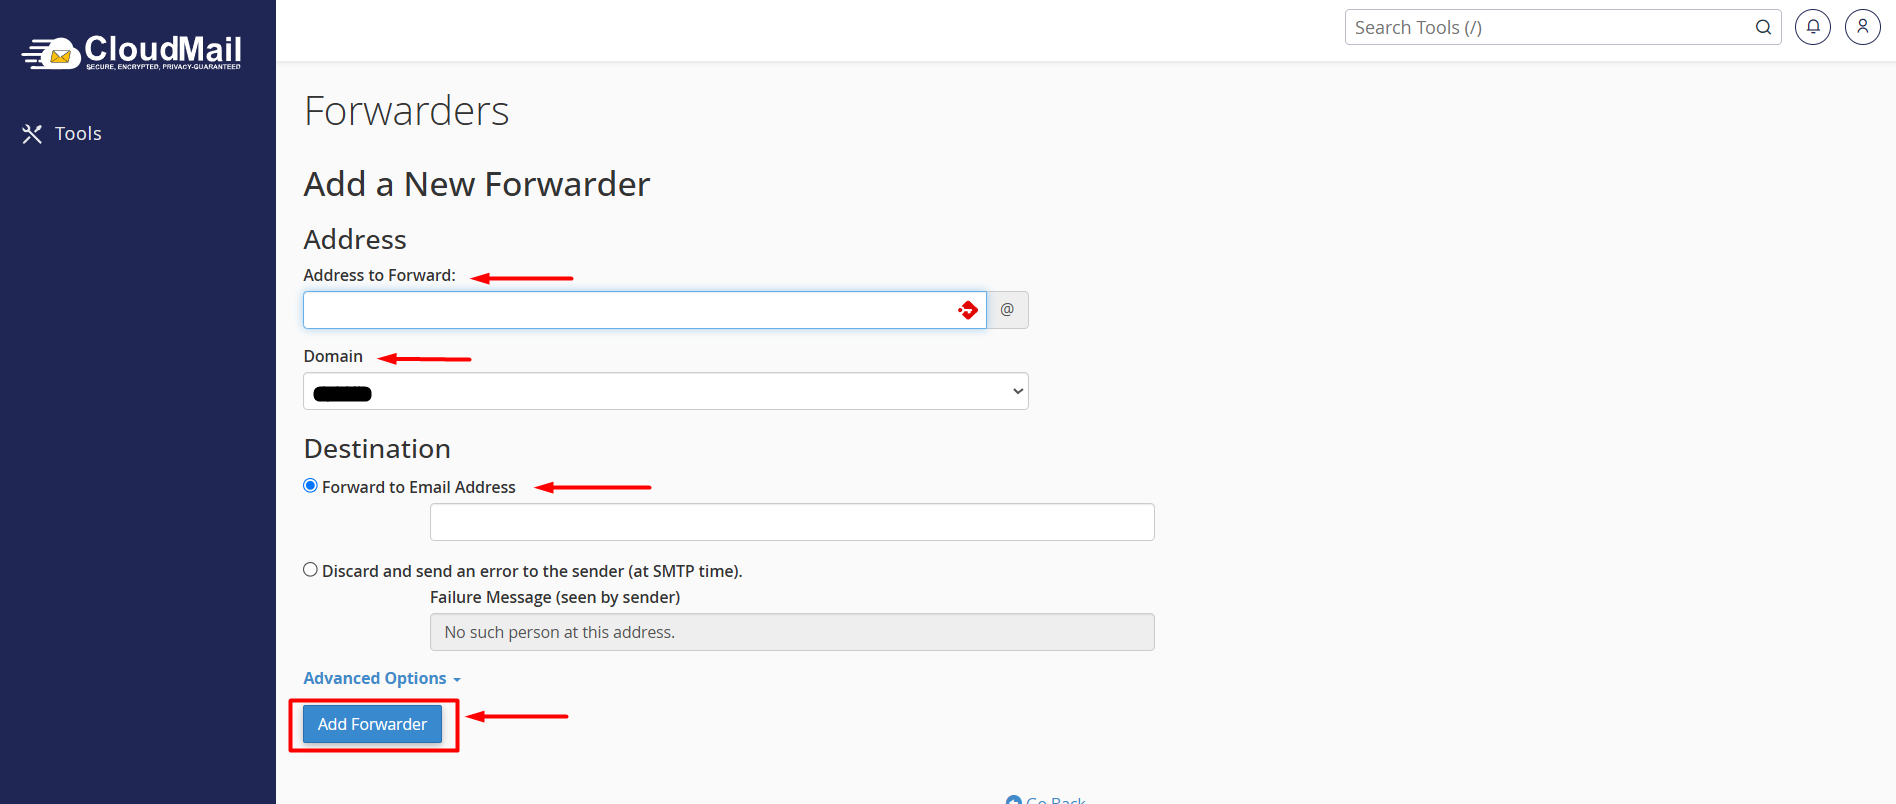
Click the "Add Forwarder" button at the bottom.
From now on, whenever a customer sends an email to [email protected], a secure clone copy will automatically land in your personal [email protected] inbox within seconds!
Part 3: Managing and Deleting Existing Records
- Changing Passwords or Storage Quotas: If an employee leaves or if a mailbox fills up, go to Email Accounts, click the "Manage" button next to that specific email, type a new password or slide the storage limit scale, and click Update Email Settings.
- Deleting Forwarders: If you no longer wish to route emails to your personal inbox, go to Forwarders, locate the active rule in the list, and click the "Delete" button next to it. This will safely terminate the forwarding loop without affecting your core mailbox files.
Emails Not Forwarding Properly? If your forwarders are set up correctly but copy emails are not arriving in your personal Gmail spam or inbox folders, your personal provider might be rejecting the message because your domain lacks modern security text logs.
Please follow our previous guide (Click Here )on Setting up SPF, DKIM, and DMARC to authorize your mail routing footprint. For immediate configuration reviews, feel free to Open a Support Ticket inside your CeylonServers client room portal!